
What You Need to Know About Paint Removers: A Complete Guide
Whether you're restoring an old piece of furniture, prepping your walls for a fresh coat, or cleaning up a DIY mishap, paint remover is your go-to solution. But with so many types, formulas, and safety concerns, it's easy to feel overwhelmed. The good news? We've broken it all down—so you can pick the right product and use it with confidence.
TL;DR (3‑lines) • Paint remover loosens or dissolves old coatings so fresh paint adheres flawlessly. • Match the stripper type (solvent, caustic, eco) to your surface and time budget. • Safety gear, good ventilation, and patience pay off in a professional‑grade finish.
What Is Paint Remover?
Paint remover, often called paint stripper, is a chemical or natural product designed to dissolve or soften paint, making it easier to remove from surfaces like wood, metal, concrete, or plastic. It can be used on a variety of paint types including latex, oil-based, acrylic, and enamel.
Some paint removers work by breaking the bond between the paint and the surface. Others soften the paint so you can scrape it off with ease. There are also mechanical options like sanding or heat guns—but chemical strippers often get the job done faster and more thoroughly.
Why Use a Paint Remover?
You might think, "Why not just paint over the old stuff?" Sometimes that works. But in many cases, removing the old paint is essential for durability, appearance, and safety.
- Better adhesion: New paint sticks better to a clean, bare surface.
- Improved finish: No bubbling, cracking, or uneven textures.
- Safety: Older paint layers may contain lead, which poses health risks.
- Restoration: Antique furniture or ornate trim often needs stripping to uncover details.
Types of Paint Removers
Not all paint removers are created equal. Depending on the surface and paint type, one may work better than another.
1. Solvent-Based Paint Removers
These are the most powerful and fast-acting. They work by dissolving the chemical bonds in paint.
Pros:
- Effective on multiple layers
- Quick results
Cons:
- Strong fumes
- May be hazardous without proper ventilation and gear
Best for: Metal, masonry, and thick, old paint layers.
2. Caustic Paint Removers
These use lye (sodium hydroxide) to break down the paint structure. They're particularly tough on oil-based paints.
Pros:
- Very effective on stubborn layers
- Works well on wood
Cons:
- Can darken wood
- Skin and eye irritant
Best for: Wood surfaces with multiple coats of oil paint.
3. Biochemical or Eco-Friendly Paint Removers
Made from natural ingredients like soy or citrus, these are safer for humans and the environment.
Pros:
- Low toxicity
- Pleasant smell
Cons:
- Takes longer to work
- May not remove all paint types
Best for: Home DIY projects, especially indoors.
4. Gel and Paste Paint Removers
These are thicker formulations that cling to vertical surfaces.
Pros:
- No dripping
- Great for walls and furniture
Cons:
- Can be more expensive
Best for: Vertical or uneven surfaces.
Eco‑friendly paint removal options
Manufacturers now offer soy‑gel and citrus‑ester products that ship in recyclable bottles and emit 50 g L⁻¹ VOC. They work slower (2–12 h) but drastically cut fumes, making them ideal for apartments and kids' rooms. If you like to plan the workflow visually, a quick layout sketch with the handy tool AI Map Generator can keep timing and re‑coat windows crystal‑clear.
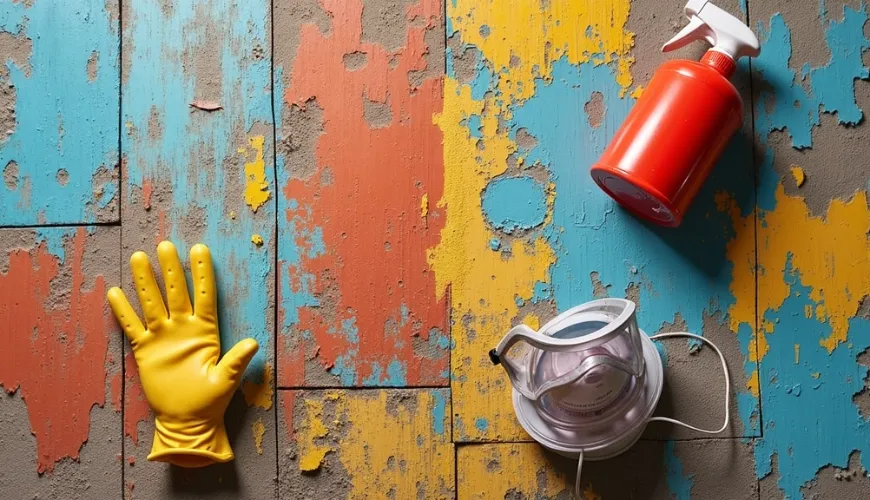
How to Use Paint Remover Safely
Using paint remover isn't just about applying and scraping. Safety is key—especially when dealing with strong chemicals.
Here's a step-by-step process to do it right:
- Read the label – Always follow manufacturer instructions.
- Ventilate the area – Open windows, use fans, or work outdoors if possible.
- Wear protective gear – Gloves, goggles, and long sleeves are a must.
- Apply the remover – Use a brush or roller to spread evenly.
- Wait the recommended time – Some need just minutes, others hours.
- Scrape off the paint – Use a putty knife or scraper.
- Clean up – Wipe down with water or a neutralizing solution based on the product used.
- Dispose of waste properly – Check local regulations for hazardous waste.
Common Mistakes to Avoid
Even seasoned DIYers can mess up if they rush through the paint removal process. Here are a few pitfalls to dodge:
- Skipping the patch test: Always test on a small area first. Some removers can damage delicate surfaces— a lesson echoed by interns in the OpenAI Internship program who prototype on hidden sections before ship‑ready code.
- Underestimating ventilation: Chemical fumes can be harmful. Never work in a closed space.
- Mixing products: Don't combine removers or cleaners—it can cause dangerous reactions.
- Ignoring surface type: What works on metal might ruin wood. Pick the right formula.
- Over‑scraping: You could gouge or scratch the surface if you're not careful—much like the unexpected twists a playful AI Fortune Teller might predict for a rush job.
Choosing the Right Paint Remover
The best paint remover for your project depends on a few key factors:
- Surface type: Wood? Brick? Metal? Each reacts differently.
- Paint layers: A thick buildup may need a more aggressive remover.
- Environment: Indoors may require a low-VOC option.
- Time: Some products work in 15 minutes, others take hours.
Here's a quick list to match product type with use case:
| Remover type | Avg. cost / qt | Typical dwell time | Layers removed | Best surface |
|---|---|---|---|---|
| Solvent gel | USD 18 – 25 | 15 – 45 min | 4 – 6 | Metal, masonry |
| Caustic paste | USD 12 – 16 | 30 – 90 min | 3 – 4 | Hardwood doors |
| Citrus/soy eco | USD 20 – 28 | 2 – 12 h | 2 – 3 | Indoor furniture |
| Infra‑red heat | USD 0 (tool rental USD 30 / day) | 2–5 min / spot | 1 – 2 | Exterior siding |
(Prices: July 2025 big‑box retailer averages; dwell time at 21 °C.)
- Citrus-based gels: Great for indoor furniture
- Heavy-duty solvent removers: Best for metal railings or exterior paint
- Lye-based pastes: Effective on old wooden doors or trim
- Eco-friendly sprays: Ideal for small craft projects or toys
Real-Life Example: Stripping an Old Dresser
Let's say you found a beautiful mid-century dresser at a garage sale—but it's covered in bumpy, chipping paint. You want to restore it to its former glory.
- You choose a citrus-based gel stripper because you'll be working inside your apartment.
- After applying it with a brush, you wait 30 minutes, then gently scrape off bubbling paint.
- Several applications later, you're down to the raw wood.
- A light sanding, a coat of sealer, and a fresh paint job later—and now it's a statement piece. (We jokingly named the restoration "Project Stratos” after browsing quirky ideas on Robot Names.)
The process took a weekend, but it saved you hundreds and gave you a one-of-a-kind item.
Are Paint Removers Safe?
This is a common question—and the answer is: it depends.
Traditional paint strippers often contain methylene chloride, a powerful solvent that can be harmful if inhaled. In 2019 the U.S. Environmental Protection Agency banned consumer sales of methylene‑chloride strippers while still permitting commercial use under strict training rules (source: EPA 84 FR 11466).
Safer alternatives like NMP-free formulas or natural removers are now widely available and work well for most home users. Still, it's crucial to treat any remover with respect. Always work in a well-ventilated area and wear proper gear.
Quick Tip: Don't Forget Neutralizers
Some paint removers, especially caustic ones, require a neutralizer after the stripping process. This step prevents leftover chemicals from reacting with your new paint or finish. Vinegar and water often do the trick, but check the product instructions to be sure.
How Long Does It Take?
The time it takes depends on the type of remover and how many paint layers you're dealing with.
- Fast-acting solvents: 15-30 minutes
- Eco-products: 2–24 hours
- Old, thick paint: May require multiple applications
So plan ahead, and don't rush the process. Patience pays off with cleaner results.
Best Paint Remover Brands to Look For
Choosing a reputable brand is half the battle. Here are a few top-rated options:
- Citristrip: Known for its strong yet safer citrus-based gel formula.
- Dumond Peel Away: Excellent for removing multiple layers at once.
- Sunnyside: Offers both traditional and environmentally friendly removers.
- 3M Safest Stripper: A trusted name in low-toxicity products.
Always check reviews and confirm the product aligns with your project needs.
Can You Make a DIY Paint Remover?
For small, non-critical jobs, some people swear by homemade solutions. A common one is:
- 1 part baking soda
- 1 part vinegar
- Hot water
This combo won't remove heavy-duty paint, but it might soften thin latex layers or clean up small spills. Just don't expect miracles.
When to Call a Pro
If you're dealing with:
- Lead-based paint
- Historic restoration
- Painted masonry on a large scale
It might be time to bring in a professional. Lead paint, in particular, needs expert handling to avoid health risks.
FAQs about paint remover
Q1. Can I use paint remover on plastic? Only citrus gels and NMP‑free removers rated "safe for plastics.” Always test first.
Q2. Is sanding faster than chemical stripping? For single‑coat latex on flat boards, yes; for ornate or multi‑layer jobs, chemicals win.
Q3. What neutralizer should I use after caustic stripper? A 50 / 50 white‑vinegar‑and‑water rinse until pH ~7, then plain water wipe‑down.
Q4. Does temperature affect dwell time? Below 60 °F / 16 °C, expect 50 % longer wait; gentle heat lamps can speed things up.
Q5. Where can I get instant project‑specific advice? Drop your question into ChaRGPT for AI‑driven tips before you start scraping.
Paint Removal Doesn't Have to Be Painful
With the right product and a bit of patience, removing old paint can be incredibly satisfying. Whether you're flipping furniture, prepping your home for resale, or fixing up a rental, having the right paint remover makes all the difference. Think of it as peeling back layers of history—one brush stroke at a time.